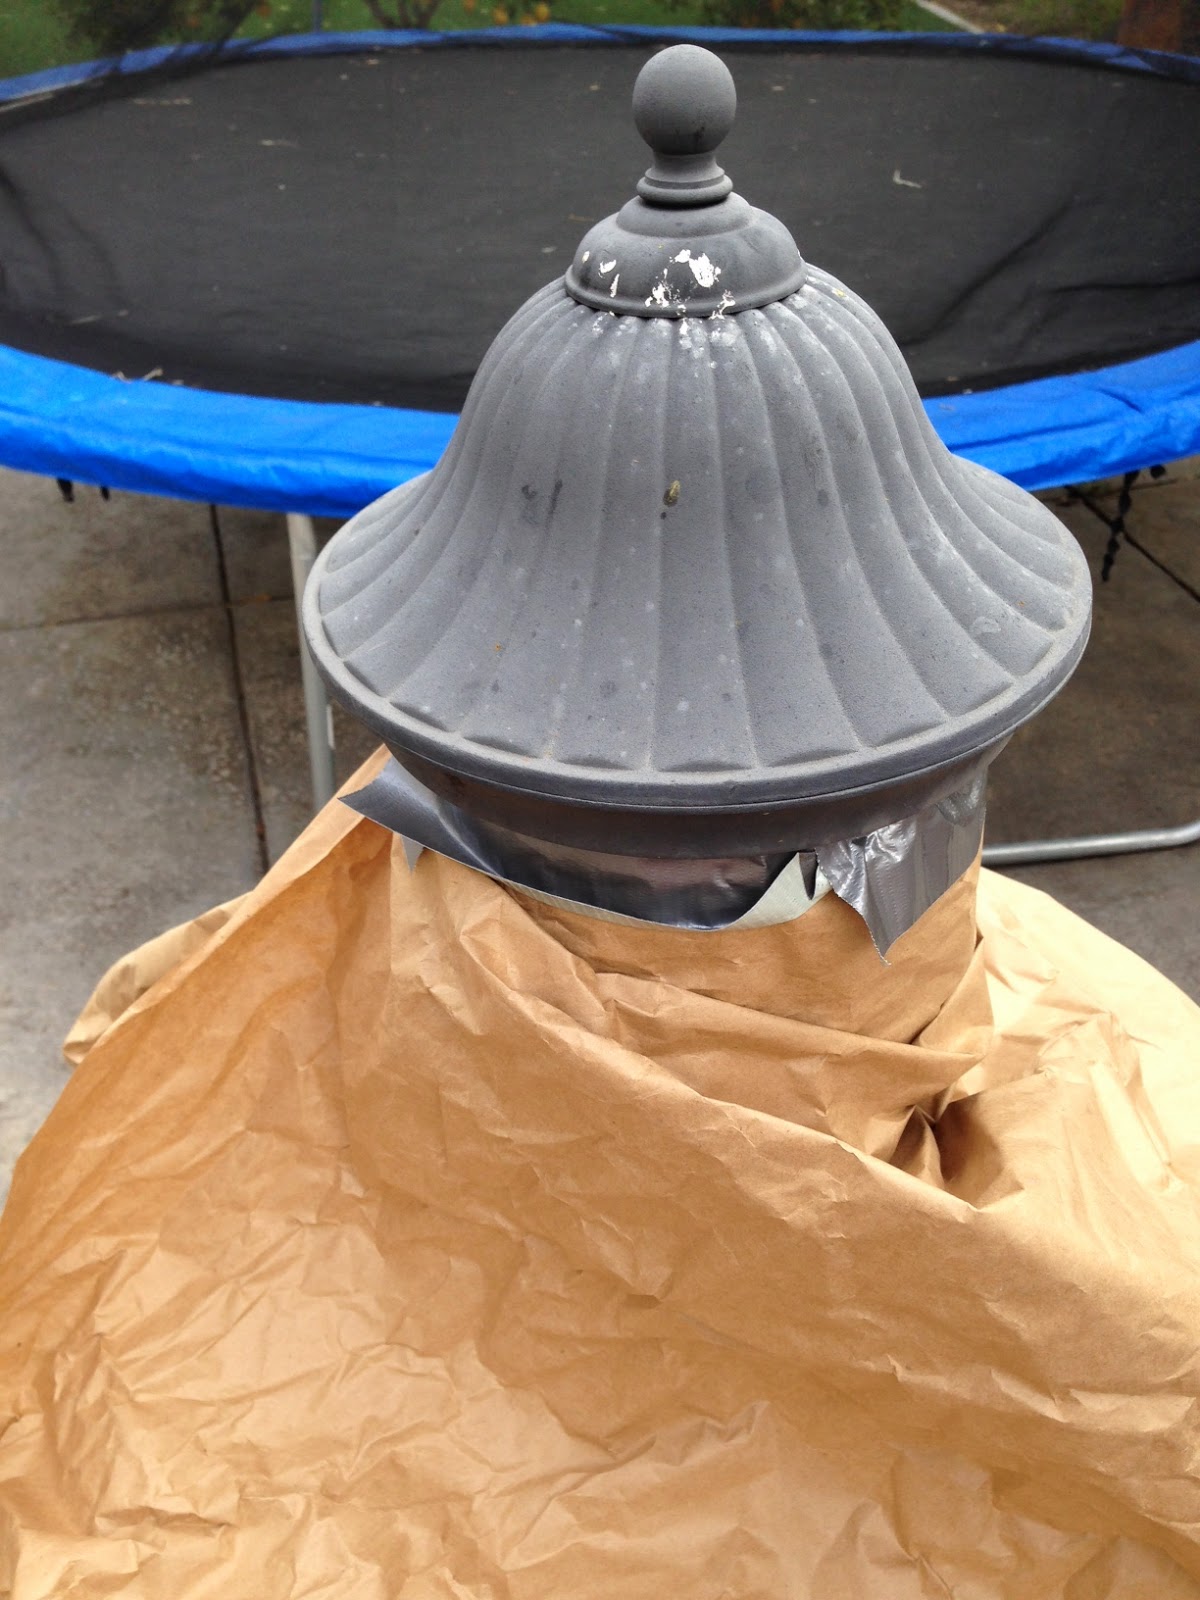
In order to get ready for the baby shower I was hosting for my sister, I wanted the backyard to be picture perfect. It is all about the details I WILL see.... all the weed pulling etc.
The outdoor gate and all of the light fixtures were looking pretty beat.
Just give me a can of black spray paint, some duct tape, and some brown paper bags and I can make it all look new!
Showing posts with label Renovations. Show all posts
Wednesday, March 19, 2014
Window Paint
Slowly, I will have repainted the entire front of my house...haha.
This metal window treatment outside over the front windows was badly faded. I couldn't tell what color it was supposed to be because there were two colors coming through; a dark greenish color and a blue.
I decided to just repaint it cream to match the window trim below.
Eventually, I want all the railing and trim detail to be cream and white and I want to get rid of the blue entirely. Looking to paint the front door a shade of black as well as these window shutters you see in the photos that are faded blue.
That's for a professional to do though...maybe!
This also happened to be the day that Boss was bit by my neighbor's dog. It was a terrible day. He is doing fine now, but it was a close call. The front of the house looks a little better...newer anyway.
This metal window treatment outside over the front windows was badly faded. I couldn't tell what color it was supposed to be because there were two colors coming through; a dark greenish color and a blue.
I decided to just repaint it cream to match the window trim below.
Eventually, I want all the railing and trim detail to be cream and white and I want to get rid of the blue entirely. Looking to paint the front door a shade of black as well as these window shutters you see in the photos that are faded blue.
That's for a professional to do though...maybe!
This also happened to be the day that Boss was bit by my neighbor's dog. It was a terrible day. He is doing fine now, but it was a close call. The front of the house looks a little better...newer anyway.
Bathroom Fixes
These have been on the "To Do" list for sometime, but with my sisters baby shower, this last weekend, I put these into high gear.
DOWNSTAIRS BATHROOM SINK:
The downstairs bathroom needed a new faucet. When I went to take the faucet out, it couldn't and wouldn't budge. The faucet had become fused to the fabricated sink/countertop piece. So, what do we do? We have to get new countertops and a new sink. It was worth it. The bathroom feels cleaner.
UPSTAIRS BATHROOM LIGHTING:
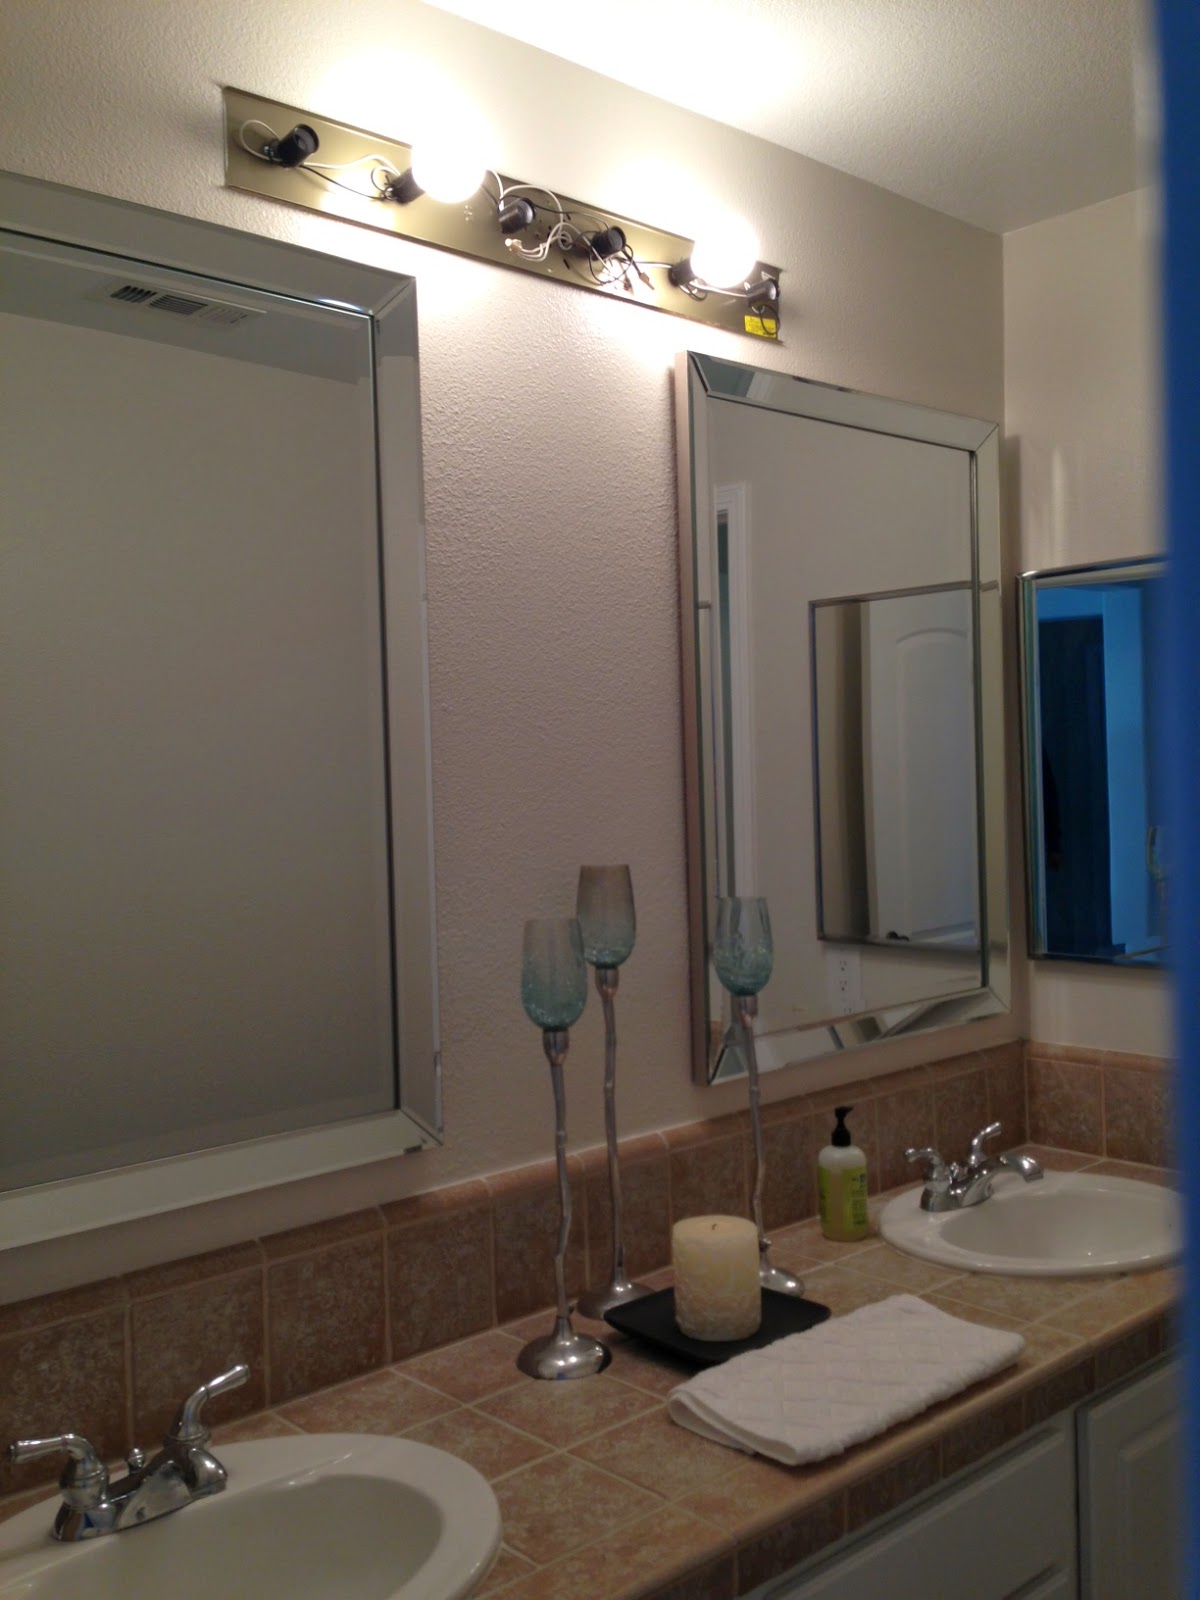
After we fixed that issue, we finally fixed the lighting in the upstairs guest bathroom.
We had originally pulled the one piece mirror down and replaced it with two fancier mirrors. That meant that we needed to replace the one light fixture with TWO. This bathroom has had this crappy light up with the two light bulbs for a year now. It was time.
I have already purchased two new under mount sinks for this bathroom, but need to find a replacement cabinet for this bathroom before we spend the money on the countertops. This cabinet is not in the best of shape.
Still looking.... maybe later this year. Or sooner. I hate this tile and the over mount sinks. Yuck.
DOWNSTAIRS BATHROOM SINK:
The downstairs bathroom needed a new faucet. When I went to take the faucet out, it couldn't and wouldn't budge. The faucet had become fused to the fabricated sink/countertop piece. So, what do we do? We have to get new countertops and a new sink. It was worth it. The bathroom feels cleaner.
| My mom Instagrams me under the sink. |
| Finished!!! |
UPSTAIRS BATHROOM LIGHTING:
After we fixed that issue, we finally fixed the lighting in the upstairs guest bathroom.
We had originally pulled the one piece mirror down and replaced it with two fancier mirrors. That meant that we needed to replace the one light fixture with TWO. This bathroom has had this crappy light up with the two light bulbs for a year now. It was time.
I have already purchased two new under mount sinks for this bathroom, but need to find a replacement cabinet for this bathroom before we spend the money on the countertops. This cabinet is not in the best of shape.
Still looking.... maybe later this year. Or sooner. I hate this tile and the over mount sinks. Yuck.
Thursday, November 14, 2013
Wish List - Bathroom Remodel!
I want to redo our master bathroom so bad.
I don't even shower in this bathroom because I hate the tile so much. I despise this brown tile and I hate the mold the previous owner left behind. Gross, I know! I clean it every week, but that pesky mold just keeps coming back. Once it gets in, you can't get it out.
I have been going to every tile place in town and all the new model homes to get ideas.
What I would like to do is get several slabs of Quartz (a manmade, durable surface) and put that on the walls and ceiling of my shower.....with as few grout lines as possible.
Since I do not have a window or vent in my shower, I need to eliminate as much grout as I can.
Here is a photo of a model home shower I liked using Quartz. I don't like how they did the accent tiles, but they ran the Quartz slabs up all the way to the ceiling and covered the entire seat in it as well. I would actually put it on the ceiling too.
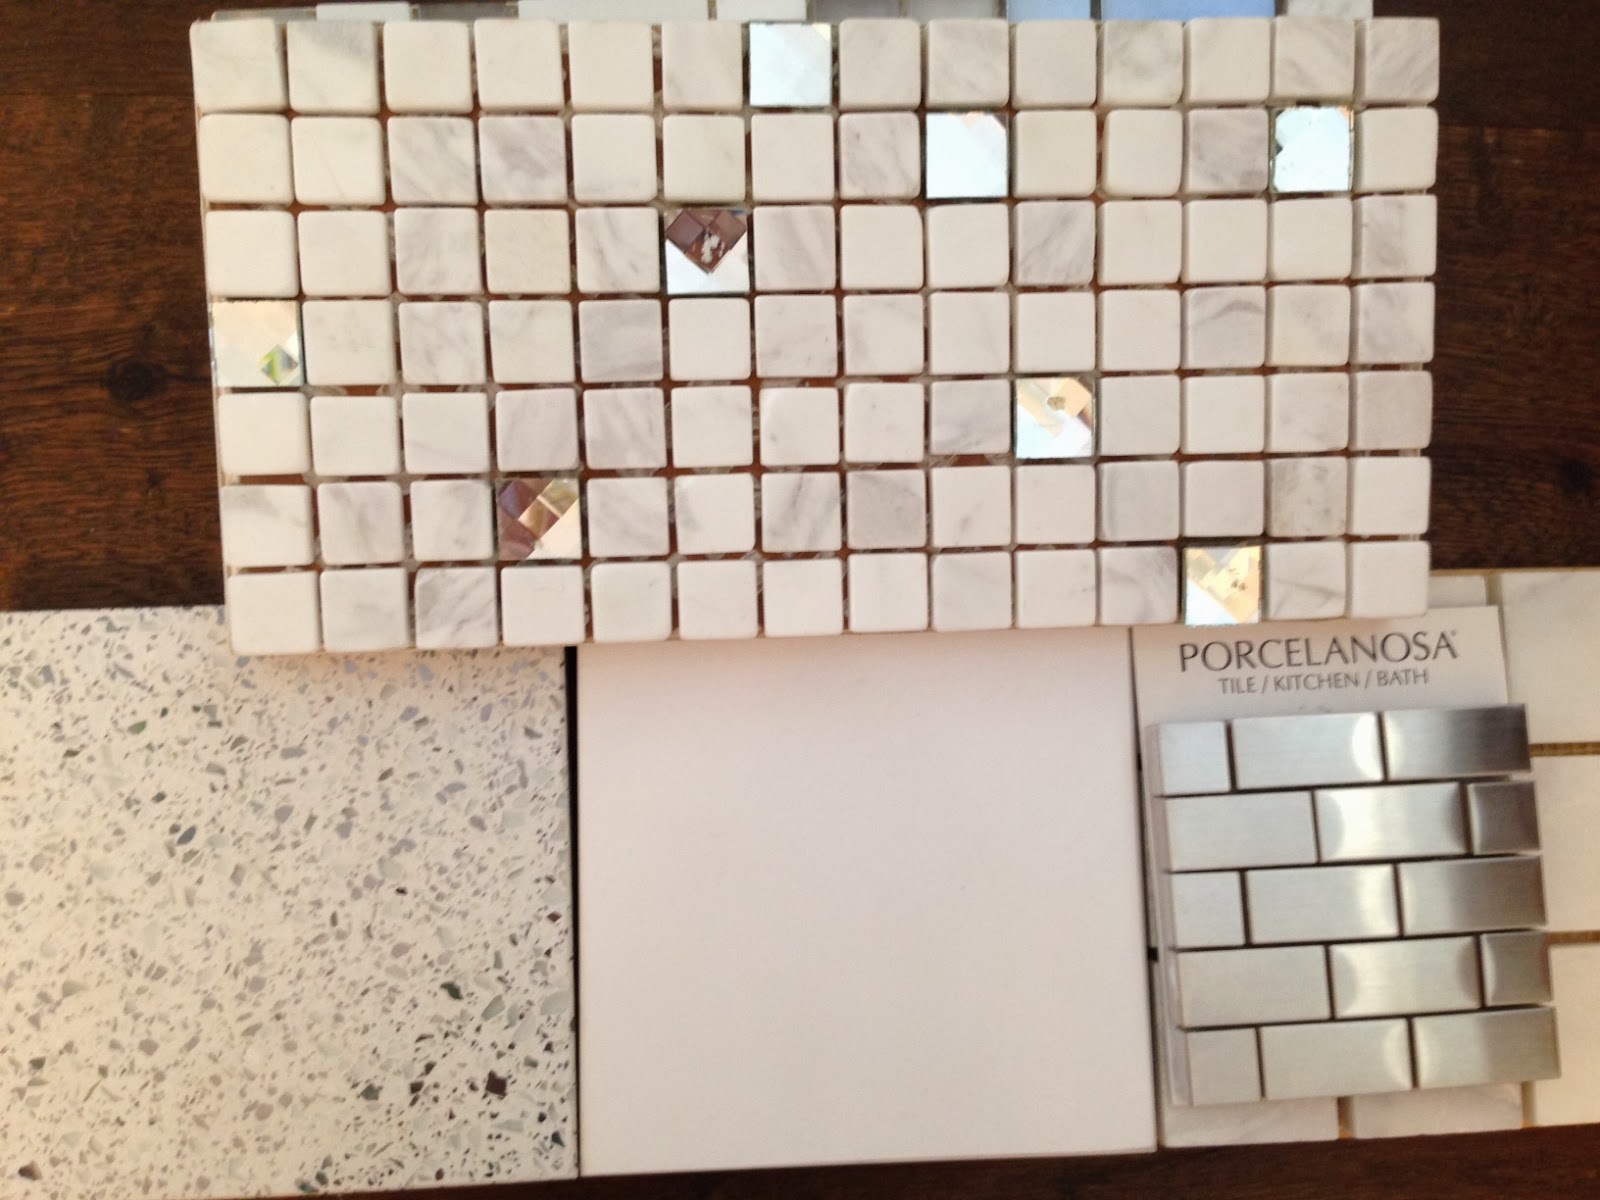
I am digging this Elysium tile called Crystallite that mixed Carrera Marble square tiles with diamond glass tiles. http://elysiummosaic.com/product_view.asp?proid=304&group_name=MILANO%20Series
You know I love my bling and chandeliers! I might put a chandelier in the bathroom if I went with this tile. Me likey.
See below.
I am looking to go with a bright white Quartz with an accent tile for the floor and maybe to run down the wall vertically.
I don't even shower in this bathroom because I hate the tile so much. I despise this brown tile and I hate the mold the previous owner left behind. Gross, I know! I clean it every week, but that pesky mold just keeps coming back. Once it gets in, you can't get it out.
I have been going to every tile place in town and all the new model homes to get ideas.
What I would like to do is get several slabs of Quartz (a manmade, durable surface) and put that on the walls and ceiling of my shower.....with as few grout lines as possible.
Since I do not have a window or vent in my shower, I need to eliminate as much grout as I can.
Here is a photo of a model home shower I liked using Quartz. I don't like how they did the accent tiles, but they ran the Quartz slabs up all the way to the ceiling and covered the entire seat in it as well. I would actually put it on the ceiling too.
I am digging this Elysium tile called Crystallite that mixed Carrera Marble square tiles with diamond glass tiles. http://elysiummosaic.com/product_view.asp?proid=304&group_name=MILANO%20Series
You know I love my bling and chandeliers! I might put a chandelier in the bathroom if I went with this tile. Me likey.
See below.
| Model Home Using Grey Quartz slabs with Carrera Marble accent tiles |
Here is my busted up brown shower. It is like a dark, creepy cave.... that was kind of going for the tuscany look. Enough with the tuscany style near the wineries people!!!!
| My sad shower.... where people go to die :( |
| Check out the tile on top! Glass Diamonds!!!!!!! Yes please. |
| I like this combo best. I'd put the silver tiles on the floor of the shower! |
Monday, October 21, 2013
FIREPLACE!!!!!
This last Sunday, I was drinking my coffee on the couch and I just couldn't stand looking at this fireplace anymore. I am having my first Thanksgiving at our house and I cannot have this unfinished project showing up in any photos. PLUS, if it should turn off cold on Thanksgiving, I am going to want this thing lit! With my luck it will be 80+ degrees, like it always is. Haha.
To start this project, I grabbed some cardboard boxes from the recycling bin (we just bought new luggage so the boxes were huge). I measured the space and created a template:
![]() |
| This was what the room looked like before - old brown tile on fireplace. |
| Step 1: Create Template! |
The next thing I did was lay all of the tile out to make sure I had purchased enough tiles. Keep in mind, I purchased this stuff 9+ months ago. Who knows where my head was at when I ordered it online.
Whew..... looks like I ordered just enough!
| Always with the "helper" in the way! |
By this point, I had convinced Scott that I could handle this project. He had been frantically searching and calling on people from Craigslist asking people to come give us a quote while I was laying all the tile out on the floor. However, I talked him into going to Lowe's and getting me a few items that I needed. I had gone two days prior and bought my thin-set, grout, and tools. I just needed one more item..... THE TILE SAW!
While Scott was out, I called my dad over to help me with the cutting.
| Prepping my station! |
| The tile cutting station! It made a mess outside. |
| My dad taking notes. I will be helping him with their bathroom remodel! |
| Praying that the tiles will all line up and connect as planned. This tile is TRICKY!!!! |
| Helping me fill in the empty spaces. |
| Putting toys in my thin-set. The wipes box makes a perfect trough. |
| Tiles up! Now we need to wait 24+ hrs before applying grout! |
I started this project on a Sunday at 1pm, I finished setting the tile around 8:30pm that same day (with some drink breaks and dinner in there too). I woke up the next morning with very sore quads. Lots of squatting in this project.
I started the grout the following Monday around 11:00am. I finished the grout around 4:30pm. The grouting took the longest and was the most work. Getting all the areas smooth, even and free of air bubbles took a lot of time and elbow grease. It was a serious workout. In the end, I think I did a pretty good job. My hands were sore for a week and extremely dry, but I can appreciate this job so much more now. I bought sliding glass doors for the front, but right now, I don't think I am going to put them on. I like the way this looks. I'll just have to watch that no toys go flying in!
Now I need to decide on furniture for this area. Now that the fireplace is done, the rug and furniture are all fighting and screaming at me to fix this eclectic mess! Too many patterns and colors fighting.
| Don't look at the mantle. It has too much junk on it! |
| Ahhh, Tuesday morning admiring my work... I need a quick break. I am too sore to clean! |
Weed Removal & Walkway
After I finished the paver project to the hose I started a project that I've been putting off.
I have pulled weeds so many Sunday mornings by our pool pumps, but they just KEEP COMING BACK! This area is overrun by weeds. It is scary.
We cleared out the weeds and I added this stone and pebble walkway to the pool pumps. Again, the only way to walk to this area was through mud, weeds, and it was gross. The previous owner left all these stones scattered through the yard, so I put them to good use.
After we put the pathway in place, we filled it in with pebble stones, we put down wood chips and put all the trees on a drip system. This should keep the weeds away. I HOPE!
I have pulled weeds so many Sunday mornings by our pool pumps, but they just KEEP COMING BACK! This area is overrun by weeds. It is scary.
We cleared out the weeds and I added this stone and pebble walkway to the pool pumps. Again, the only way to walk to this area was through mud, weeds, and it was gross. The previous owner left all these stones scattered through the yard, so I put them to good use.
After we put the pathway in place, we filled it in with pebble stones, we put down wood chips and put all the trees on a drip system. This should keep the weeds away. I HOPE!
| Ahhhhh! Its the garden of scary weeds!!!! |
| Walkway in place! |
| AFTER!!!!! |
| BEFORE & AFTER |
More Pavers!!
We have been traveling and busy with everyday life that I haven't had a chance to do any projects.
We went up to Half Moon Bay and San Francisco for 10 days and when we were away, I promised I would come back and get stuff done. I am sticking to that promise.
First project I tackled (after recovering from being sick for 2 weeks when we returned), was another paver project. We have a hose at the back of the yard and the only way to access it was to walk through mud. So I decided to add another pathway. Unfortunately, there is a tapped off sprinkler right in the middle, but Scott will fix that soon!
| I bought 80 pavers at LOWES. |
| BEFORE!!! |
| Cleared the area out and put down a weed barrier! |
| Second, I played with the shape. This didn't work for me. |
| I decided to wrap the path around an existing rock. |
| Then its all about how to fill in the shape! |
| Next, filling in sand and making sure everything is level. |
| Always with my little helper by my side! |
| Finished! |
| Planted two more Bird of Paradise. I think that yellow palm needs to GO, though! |
Subscribe to:
Posts (Atom)